

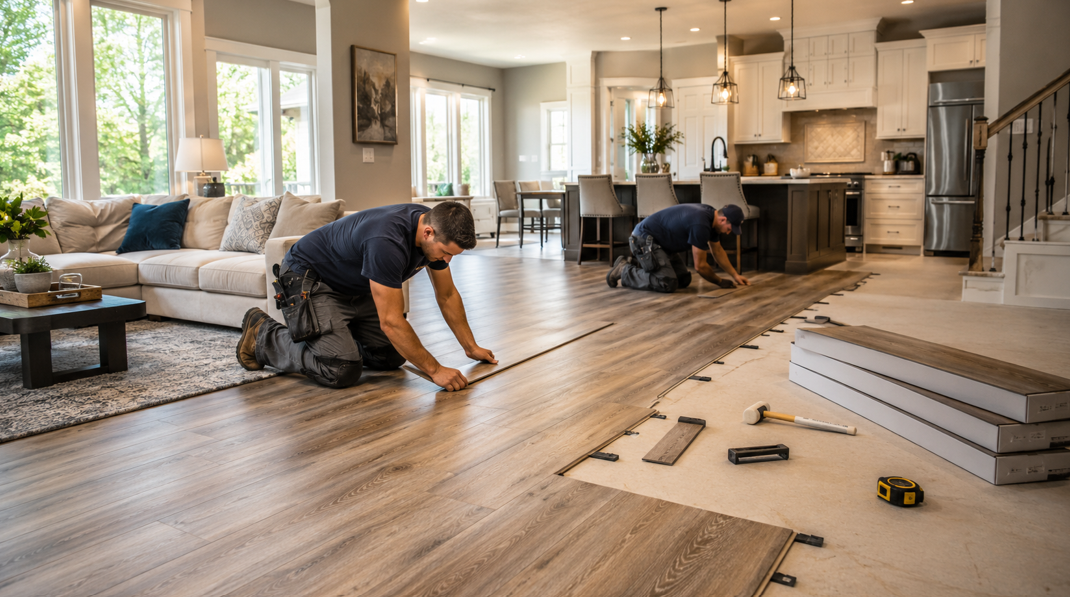
New flooring can completely change how a home looks and feels, but homeowners often have questions about what happens between choosing a product and seeing the finished room. How long will installation take? Does the existing floor need to come out? What happens to the furniture? When can the room be used again?
For Farmington Hills homeowners, understanding the installation process makes it easier to plan with confidence. Luxury vinyl is popular because it combines realistic wood or stone visuals with practical durability, straightforward care, and options suited to many active households.
Michigan Carpet and Flooring Inc. helps local homeowners move through the flooring process from product selection and in-home measurement to subfloor preparation and professional installation. Every project is different, but most installations follow the same general stages.
Knowing what to expect before, during, and after installation can help you prepare your rooms, protect your belongings, and give the new floor the best possible start.
The Process Begins With Choosing the Right Product
Installation planning starts before a single plank is placed. The product needs to match the room, household, subfloor, and expected level of use.
Luxury vinyl is available in several formats, including planks designed to resemble hardwood and tiles that recreate stone or ceramic looks. Products may also differ in thickness, wear-layer construction, backing, edge design, installation method, and moisture-related warranty coverage.
Consider How the Room Is Used
A busy kitchen has different needs from a guest bedroom. A basement may require more moisture planning than an upstairs hallway. A household with pets may place greater importance on scratch resistance and easy cleanup.
Before selecting a product, consider:
Daily foot traffic
Pets and children
Spill frequency
Direct sunlight
Furniture movement
Rolling office chairs
Existing flooring
Subfloor type
Room location
Desired comfort and sound control
The right product is not simply the one with the most features. It is the one designed to perform in the intended space.
Compare Installation Methods
Luxury vinyl may be installed using a floating click-lock system, adhesive, or another manufacturer-approved method.
A floating floor connects at the edges and rests over the subfloor without being attached across the full surface. Glue-down products are secured directly to a prepared subfloor. Each approach has benefits, and the best option depends on the room, product, subfloor, and manufacturer requirements.
Homeowners do not need to decide this alone. A flooring professional can explain how each method affects preparation, transitions, comfort, repairs, and long-term performance.
What Happens During an In-Home Measurement?
An accurate measurement is one of the most important early steps. It determines how much material is needed and helps identify details that may affect the installation plan.
The person measuring the home may review:
Room dimensions
Closets and adjoining spaces
Doorways and hallways
Stairs and landings
Floor vents
Cabinets and islands
Appliances
Transitions between surfaces
Existing flooring
Subfloor condition
Access to the work area
Rooms are rarely perfect rectangles. Bay windows, angled walls, built-ins, fireplaces, and unusual layouts can all affect material quantities.
Why Extra Material May Be Needed
The amount ordered is usually greater than the exact square footage of the room. Additional material may be needed for cuts, plank direction, room shape, pattern alignment, and possible future repairs.
This allowance is sometimes called a waste factor, although the material is not necessarily wasted. Much of it is used to create clean cuts and a balanced layout.
Keeping a small amount of matching flooring after installation can also be useful. Product colors and styles may change over time, so spare planks can help if a future repair becomes necessary.
What the Measurement May Reveal
An in-home visit can identify practical issues before installation day. Examples include uneven areas, damaged subfloor sections, moisture concerns, height differences, or door-clearance limitations.
Finding these details early supports better planning and reduces the likelihood of unexpected decisions once work begins.
Preparing Your Home Before Installation Day
The installation team needs a clear, accessible workspace. Preparation requirements vary, so homeowners should confirm responsibilities before the scheduled date.
Ask Who Will Move the Furniture
Some installation plans include furniture movement, while others require the homeowner to clear the room in advance.
Even when large furniture will be moved by the installation team, homeowners are generally better off removing smaller and personal items, including:
Lamps
Electronics
Books
Decorative objects
Plants
Fragile items
Bedding
Clothing from floor-level storage
Small tables and chairs
Toys and pet supplies
Emptying low shelves and cabinets can also make furniture safer and easier to move.
Certain heavy, delicate, or specialized items may require separate arrangements. These can include pianos, aquariums, safes, pool tables, antiques, and oversized appliances.
Clear a Path Through the Home
Installers need room to bring in materials, tools, and equipment. Clear the path from the entrance to the installation area and remove anything that could restrict movement.
During snowy or wet Farmington Hills weather, provide a safe entry route when possible. The team may use protective coverings in nearby areas, but clear access still helps the project move efficiently.
Make Plans for Children and Pets
Installation involves tools, open doorways, material movement, noise, and active work areas. Children and pets are usually more comfortable and safer away from the room being installed.
Pets may also become anxious around unfamiliar sounds and visitors. A secure room elsewhere in the home or temporary arrangements outside the house can make the day easier.
Does the Existing Flooring Need to Be Removed?
The answer depends on the new product, current floor, subfloor, height limitations, and manufacturer instructions.
In some cases, luxury vinyl can be installed over an existing surface that is clean, secure, dry, smooth, and approved for the chosen product. In other cases, the existing floor needs to be removed.
Homeowners can browse luxury vinyl flooring options while discussing which installation methods and preparation requirements suit their rooms.
Reasons Removal May Be Recommended
Existing flooring may need to come out if it is:
Loose or damaged
Uneven
Soft or unstable
Moisture-affected
Heavily textured
Incompatible with the new product
Creating excessive floor height
Preventing proper door or appliance clearance
Removing the old floor also gives the installer direct access to the subfloor, making it easier to inspect and prepare the surface.
What Happens to the Removed Material?
Confirm whether removal and disposal are included in the project. Different materials may require different handling, and disposal or recycling options vary by flooring type and local availability.
Some homeowners choose to remove flooring themselves, but this needs careful planning. Improper removal can damage the subfloor, leave adhesive residue, or create additional preparation work.
Older flooring and adhesives may also require specialized assessment. When the age or composition of a material is uncertain, it is sensible to ask a qualified professional before disturbing it.
Why Subfloor Preparation Matters
Luxury vinyl performs best over a properly prepared foundation. Even a high-quality product can show problems if the surface beneath it is uneven, unstable, dirty, or affected by moisture.
The Subfloor Needs to Be Flat
Luxury vinyl can follow the contours of the floor below. High spots, low spots, seams, or debris may eventually become visible or place pressure on the flooring connections.
Preparation may involve:
Removing loose material
Scraping adhesive residue
Sanding high areas
Filling low spots
Securing loose panels
Repairing damaged sections
Cleaning dust and debris
Applying approved patching materials
The goal is not always to make the floor perfectly level across the entire home. The surface needs to meet the flatness and preparation requirements of the flooring manufacturer.
Moisture Conditions Need Attention
Basements, concrete slabs, kitchens, entry areas, and rooms near plumbing may require additional moisture planning.
Luxury vinyl is often selected for moisture-prone spaces, but that does not mean moisture beneath the floor can be ignored. Excess moisture in concrete or an unresolved leak may affect adhesives, subfloor materials, warranties, or indoor conditions.
The installer may recommend moisture testing, a suitable barrier, repairs, or further evaluation before the floor is installed.
Subfloor Repairs Can Protect the Investment
Soft areas, movement, squeaks, rot, damaged panels, or uneven transitions may need to be corrected first.
Subfloor preparation can add time to a project, but it supports a smoother appearance and more reliable performance. Covering a known problem rarely makes it disappear.
Will the Flooring Need to Acclimate?
Acclimation means allowing flooring material to remain in or near the installation environment before it is installed.
Requirements vary by product. Some manufacturers require a specific acclimation period, while others allow installation under certain temperature and storage conditions without extended waiting.
The flooring should be handled according to the exact manufacturer instructions. Homeowners should not assume that every luxury vinyl product follows the same rules.
The home may also need to remain within a recommended temperature and humidity range before, during, and after installation. Heating and cooling systems should generally be operating normally unless the installer provides different instructions.
Material should be stored carefully and protected from extreme cold, heat, moisture, and direct sunlight.
What Happens on Installation Day?
The team will usually begin by reviewing the work area and confirming the plan. This may include plank direction, transition locations, trim details, furniture movement, and any preparation discovered after the old floor is removed.
The Layout Is Planned
Plank direction affects how the room looks. Flooring may be aligned with the longest wall, the main source of natural light, a hallway, or an adjoining room.
Installers also plan the placement of first and last rows to avoid awkward narrow pieces where possible. Room shape, cabinets, doorways, and connected spaces all influence the layout.
The Floor Is Installed
With a click-lock floor, planks are connected and fitted across the room while required expansion space is maintained around the perimeter.
With a glue-down floor, approved adhesive is applied according to the manufacturer’s instructions. Planks or tiles are then positioned carefully, and the surface may be rolled to support proper contact.
The team works around door frames, vents, cabinets, and other fixed features. Detailed cuts take time, especially in rooms with multiple angles or obstacles.
Transitions and Trim Are Completed
Transitions help connect luxury vinyl to carpet, tile, hardwood, or another surface. They can also accommodate changes in height between rooms.
Depending on the project, baseboards may remain in place, be removed and reinstalled, or be paired with shoe molding or quarter round. The chosen approach should be discussed before installation begins.
The Work Area Is Cleaned
At the end of the project, installers generally remove installation debris and complete a basic cleanup of the work area.
Homeowners should ask in advance what cleanup and disposal are included. Expectations may differ depending on the project agreement.
How Long Does Luxury Vinyl Installation Take?
There is no single timeline that applies to every project.
A straightforward room with a ready subfloor may be completed relatively quickly. A larger project involving several rooms, furniture movement, flooring removal, subfloor repair, stairs, or detailed transitions will take longer.
Factors affecting the schedule include:
Total square footage
Number of rooms
Room shape
Installation method
Existing flooring removal
Subfloor preparation
Moisture concerns
Furniture and appliance movement
Custom cuts
Stairs
Trim work
Adhesive curing requirements
Homeowners should build some flexibility into the plan, especially when the subfloor cannot be fully inspected until the old flooring is removed.
A careful installation is more important than rushing to meet an unrealistic timeline.
When Can You Walk on the New Floor?
The answer depends on the installation method and product instructions.
Floating click-lock flooring may often be ready for light foot traffic soon after installation, although trim, transitions, or other finishing work may still be underway.
Glue-down luxury vinyl may require a waiting period before regular foot traffic, furniture placement, or cleaning. The adhesive needs enough time to develop the required bond.
Ask the installer for clear guidance on:
Walking on the floor
Replacing furniture
Moving appliances
Using rolling chairs
Wet cleaning
Placing rugs
Allowing pets into the room
Operating radiant heating, where applicable
Following these instructions protects the installation during its earliest stage.
Moving Furniture Back Into Place
Furniture should be lifted rather than dragged across the new flooring.
Use suitable protective pads under table legs, chairs, sofas, beds, cabinets, and other heavy pieces. Pads need to remain clean and should be checked periodically because trapped grit can scratch the surface.
Heavy furniture may also need weight-distributing protectors. Rolling chairs should use flooring-compatible casters or an approved protective mat.
When moving refrigerators, ranges, or other appliances, use suitable protection and follow professional guidance. Appliance edges and wheels can damage flooring when weight is concentrated in a small area.
Caring for Luxury Vinyl After Installation
Luxury vinyl is known for practical maintenance, but the correct routine helps preserve its appearance.
Remove Grit Regularly
Dust, sand, and grit can act like abrasive material under shoes and furniture. Sweep with a soft broom or use a vacuum approved for hard flooring.
Entry mats can reduce debris tracked in from outside, which is especially helpful during Michigan winters.
Clean Spills Promptly
Luxury vinyl often handles everyday spills well, but prompt cleanup remains the best practice. It prevents residue, reduces slipping, and protects seams and adjoining materials.
Use Approved Cleaning Products
Follow the manufacturer’s care instructions. Avoid abrasive pads, harsh solvents, waxes, polishes, or steam cleaning unless the flooring manufacturer specifically approves them.
More cleaning solution is not necessarily better. Residue can leave the surface looking dull and may attract dirt.
Protect High-Use Areas
Use protective pads beneath furniture and suitable mats near entrances. Avoid rubber-backed rugs unless the manufacturer confirms compatibility, as certain backing materials may discolor some floors.
Keep pet nails trimmed and place protective surfaces beneath water bowls, plant pots, and other items that may create repeated moisture exposure.
Questions to Ask Before the Project Begins
A clear conversation before installation helps everyone understand the plan.
Ask:
Is this product approved for the room?
Which installation method will be used?
Does the flooring need to acclimate?
Who moves the furniture?
Is old flooring removal included?
How will the subfloor be assessed?
Are moisture tests recommended?
Could repairs affect the schedule or cost?
Which transitions and trim will be used?
How much extra material will be ordered?
What cleanup and disposal are included?
When can the floor be walked on?
When can furniture return?
Which cleaning products are approved?
What installation records should be kept?
Keep the product specifications, care instructions, receipts, warranty documents, and leftover material together after the project.
A Smooth Start for Your New Farmington Hills Floor
Luxury vinyl installation involves much more than placing planks across a room. Product selection, accurate measurement, preparation, moisture planning, layout, trim, and post-installation care all contribute to the result.
Homeowners can prepare by clearing personal items, confirming furniture arrangements, securing pets, and asking detailed questions before work begins. It is also helpful to expect some flexibility if hidden subfloor concerns appear after the existing flooring is removed.
Michigan Carpet and Flooring Inc. is a family-owned flooring business with more than 30 years of experience. Its knowledgeable team provides showroom and shop-at-home support, design consultation, in-home measurement, flooring installation, subfloor repair, estimates, and financing options for local homeowners.
To discuss your rooms, compare installation-ready products, or request a professional estimate, get in touch with the Michigan Carpet and Flooring Inc. team.


